
FFI MODULE 3: FERMENTATION
Prior to this taking course, the extent of my fermentation knowledge started and ended with quick pickling (pickled red onions are my jam). So, suffice it to say that I had a lot of room for growth with respect to my fermenting skills. As with all of the course sections I’ve taken so far, the FFI Module 3: Fermentation section was choc-full of so much information that was completely new to me.
Fermented foods have been used for centuries – well before we knew how healthy they are or since the dime a dozen kombucha brands started flooding our neighborhood markets. In fact, people would often ferment food purely for the benefit of longer shelf life and as a way to preserve foods in the winter.
Here’s what else I learned:
- In short, fermentation is the process by which sugars and carbohydrates convert to CO2, alcohols, and other organic acids through the absence of oxygen or an “anaerobic” condition. There are two ways to make fermented foods: either by introducing a “culture” into the food (store-bought probiotics or kombucha starter (a.k.a. “SCOBY”), or by organically creating an environment for the microbial bacteria to grow.
- Most importantly, and as was implored by the Future Food Institute course creators, the main ingredient required in fermentation is time. The fermenting period for these recipes ranged from 24 hours to 2 weeks, and though it was certainly a waiting game, the end results were so worth it.
I’m always curious about the health benefits of plant-based foods, so I wanted to go a little deeper into why fermented foods are such incredible (and essential) nutritional powerhouses.
WHY YOU SHOULD EAT FERMENTED FOODS
- The nutrients in fermented foods are highly digestible – and more bioavailable – than most foods. This is because the fermentation process breaks down the nutrient properties into more readily absorbable and digestible forms.
- During the microbial digestive process that happens when we eat fermented foods, folic acid, B vitamins, thiamin, niacin, biotin, riboflavin, and fatty acids are produced. During this process, these nutrients are easier for your gut to process and more readily absorbable. Super cool, right? I’m definitely more motivated to make and eat more fermented foods after this course.
With that, I’m so excited to share some of the recipes I learned in FFI Module 3: Fermentation!
COCONUT YOGURT
I LOVE yogurt, so I was thrilled to see that I’d be learning how to make my own in this initial lesson of the fermentation module. I learned that yogurt is made by adding cultures that produce lactic acid to milk (in this case, coconut milk), also known as probiotics (in this case, lactobacillus bulgaricus and streptococcus thermophilus), and others such as lactobacillus acidophilus and Bifidus are also commonly added to create a perfect balance of bacteria to promote better digestion and immunity.
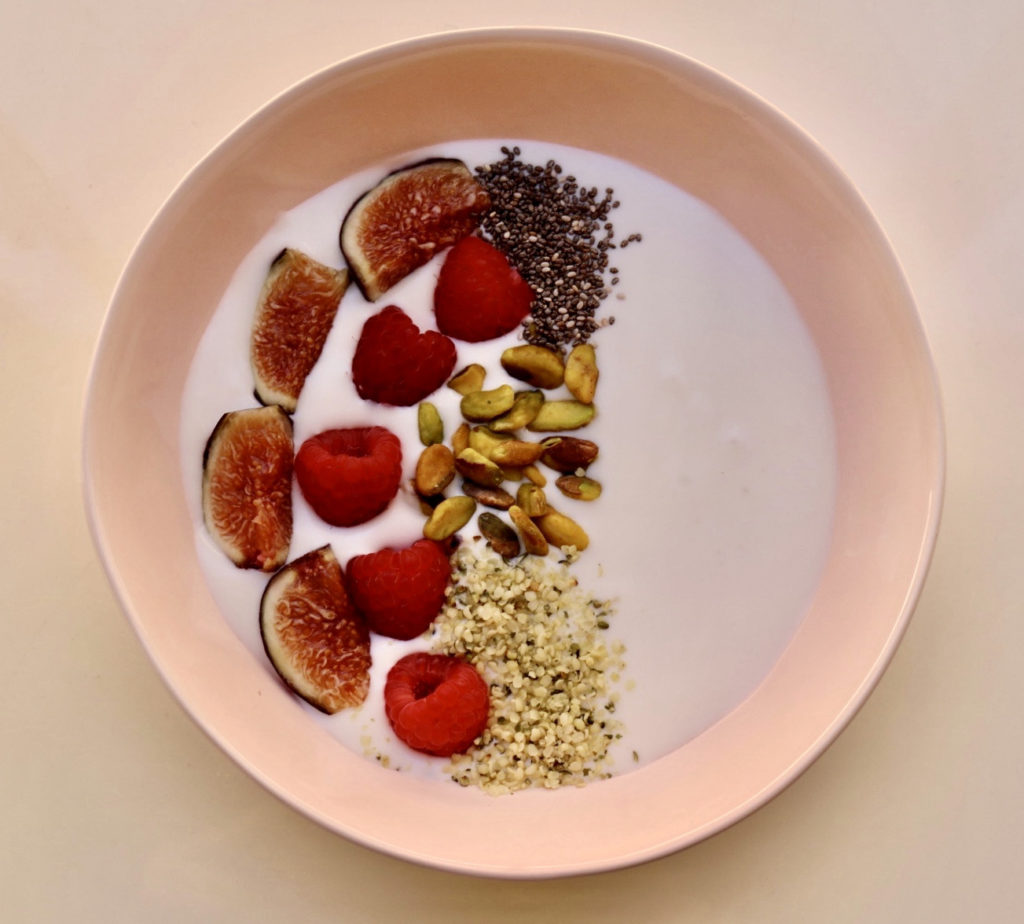
It took some trial and error for me to create the consistency I wanted with the yogurt, but once I grasped the general concept it was relatively easy and requires minimal ingredients (coconut cream, coconut oil, vanilla, maple syrup, agar-agar, and probiotic capsules). You essentially combine the first four ingredients in a blender, then add heat it in a stockpot and add the agar-agar (a seaweed-based thickening agent). Just add the probiotics, transfer to a jar, and allow to ferment in a warm environment for about 24 hours (I wrapped the jar in towels and placed it on top of a heating pad, some people just put the jar in the oven with the light on). The yogurt turned out super creamy and rich, and I topped it with figs, berries, pistachios, hemp seeds, and chia seeds, and added extra to my smoothies for the week.
KOMBUCHA
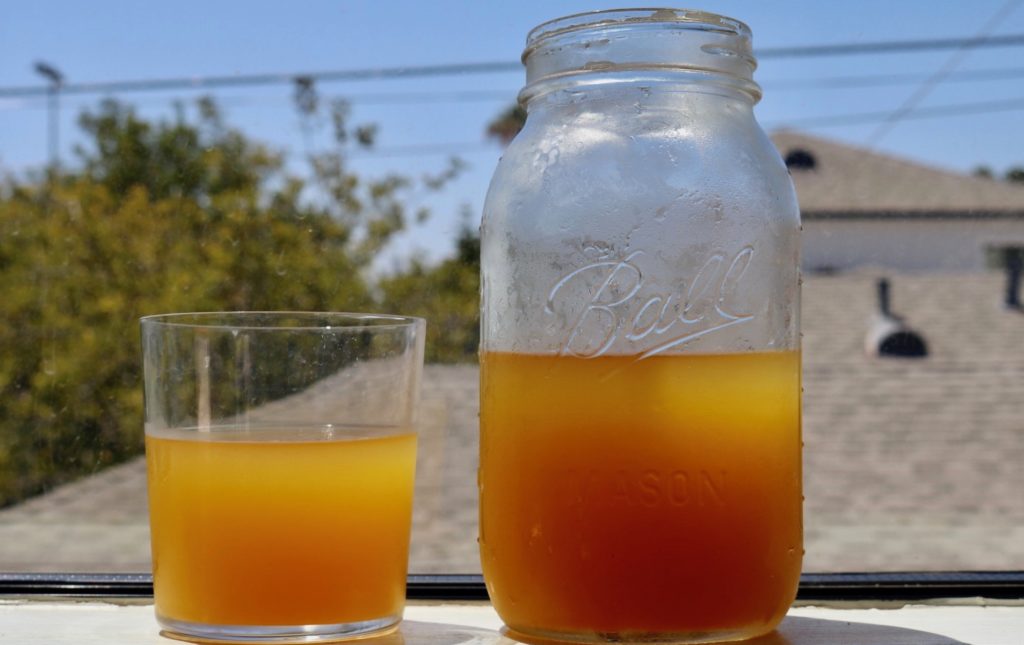
I had a ton of fun with this kombucha lesson. SCOBY was a completely new term for me (it stands for Symbiotic Culture of Bacteria and Yeast) and serves as the “mother” for starting a new batch of kombucha. I bought the Fermentaholics organic SCOBY and loose-leaf Allegro tea on Amazon, then all you need is cane sugar and your juice of choice (I went with mango peach).
The preparation is fairly simple: just brew the tea, add it to a jar with sugar, cool to room temp (below 95F so the bacteria won’t die), add the SCOBY and liquid from the starter, and ferment for 9-12 days, tasting every 5 days. After this phase, add the juice keeping a 1:3 ratio of juice to kombucha, ferment for another 2-3 days, then refrigerate. You’ll have a slightly bubbly, refreshing kombucha from scratch (and keep that SCOBY so you can continue re-using it as starter)!
INFUSED TAMARI
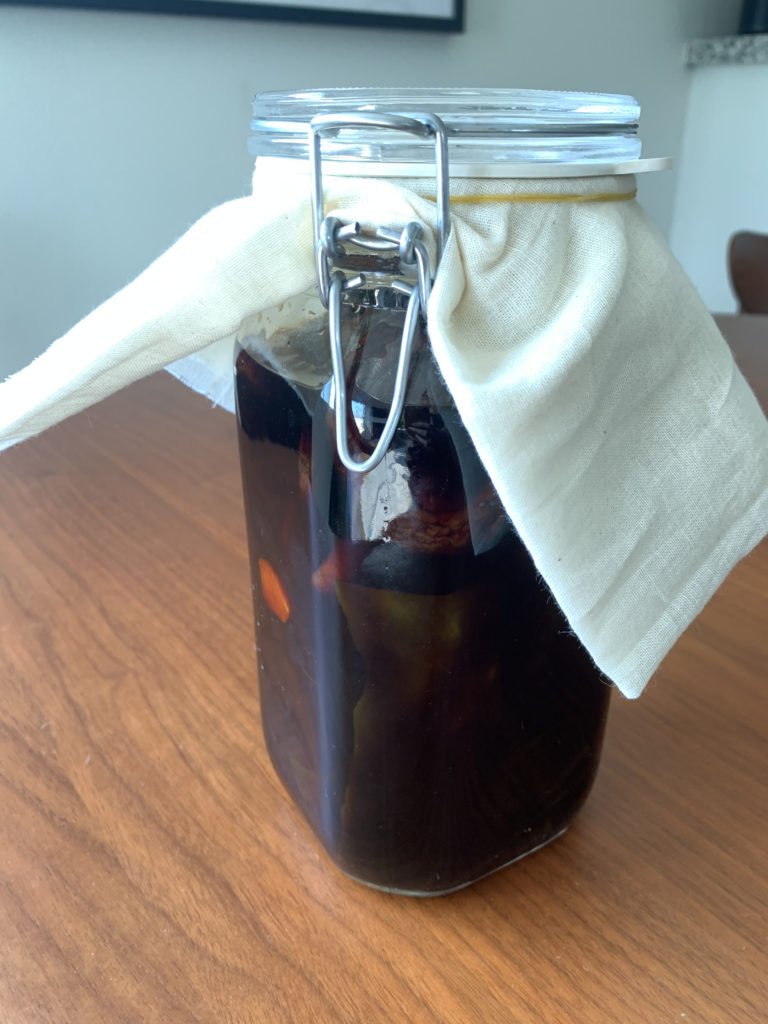
This was probably the *coolest* lesson in FFI Module 3: Fermentation, in that it gave me an excuse to buy, and learn to use, a SMOKING GUN! It was incredibly fun to smoke the garlic and dried shiitake mushrooms that were used to infuse the tamari. After smoking them by placing the tube of the smoker in a sealed bowl, you just add them to a glass jar with tamari, sake, and dried kombu. Then, ferment the mixture for two weeks.
The infusion time was so worth it – I’ve actually gone through well over half the liter of tamari within a couple of weeks, mainly to make my favorite marinade that I use for teriyaki bowls. The subtle umami flavor created by the infused mushrooms really livened up the flavors of the tofu and veggies I use, all on top of warm, fluffy, short grain brown rice. YUM.
SPROUTED BELUGA LENTILS
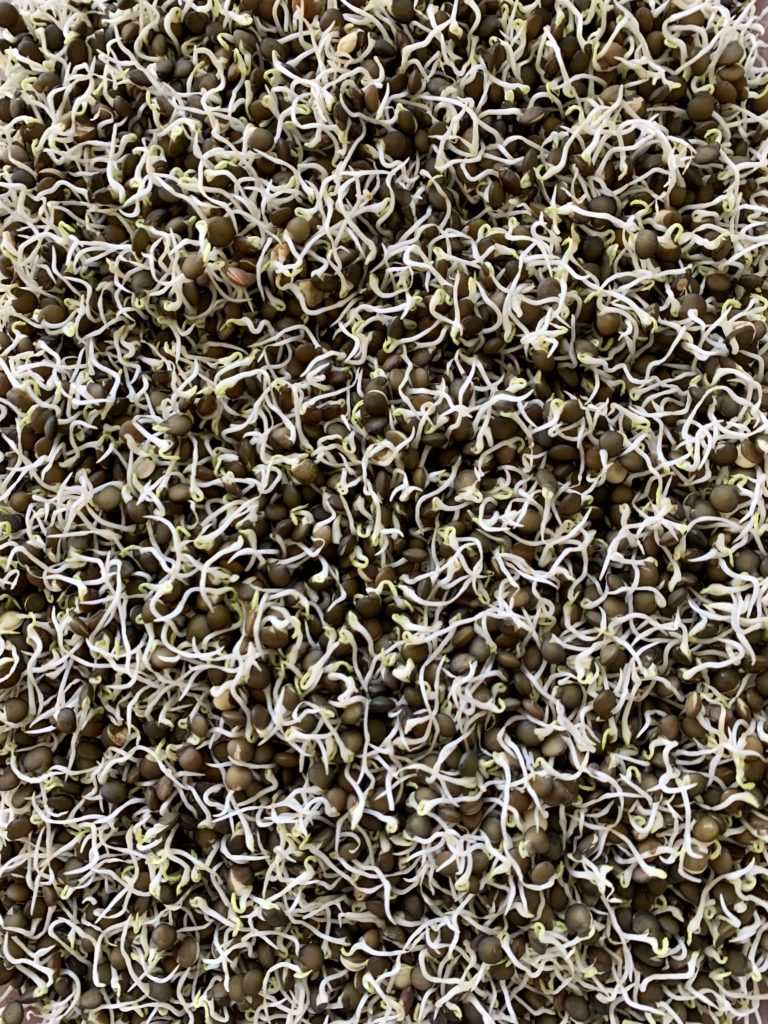
This recipe required the most active fermentation process, which I admittedly found to be a bit confusing and tedious at first. But once I got the hang of it, I grew to really enjoy and appreciate the process. L also learned that sprouting lentils is a great way to create the most bioavailability when eating these superfood legumes. By doing so, you’re essentially breaking down the starches and making the vitamins and minerals more readily absorbable and digestible. All you need are beluga (or black) lentils, water, a large jar, and a baking sheet.
The process goes like this: start off by soaking the lentils for 24 hours, then follow a draining, rinsing, drying, and second draining schedule for about 4-5 days. The process creates the ideal environment for the bacteria needed for the lentil seed to germinate, then sprout. Once the sprout is about 2 cm, your little belugas are ready to eat! I used mine to top off avocado toasts and salads – it brought such a nice texture, crunch, and protein boost to simple weekday lunches.
KIMCHI
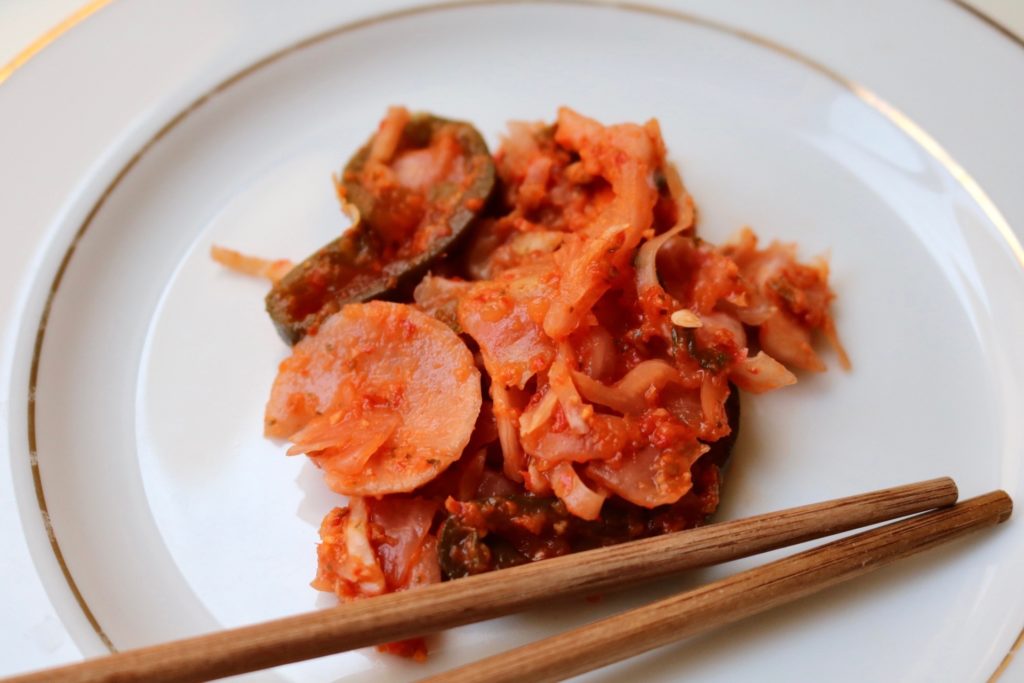
Unpopular opinion: I’m not usually the biggest kimchi fan! I’ll eat it, but for whatever reason, my palette doesn’t crave it. That being said, I loved learning how to make this special paechu kimchi, which is a super flavorful version of kimchi that includes an incredibly zesty, spicy sauce in addition to the brine.
Kimchi is a unique dish because it uses anaerobic fermentation (absence of oxygen) to promote the growth of lactobacillus bacteria. After you brine a combination of cabbage, carrot, radish, green onion, and cucumber for 24 hours, you drain the veggies. Then, with a blended combination of bell pepper, tomato, garlic, ginger, parsley, habanero, sesame oil, gochugaru pepper, and tamari, you create a paste that is then mixed with the brined veggies. With gloves, just massage the paste into the veggies, then add it all to a large glass jar and cover, allowing it to ferment for 4-6 days (I opted for the latter because I like mine super pickled). The kimchi turned out great and had a nice kick to it, and I’ve been adding it to my stir frys and teriyaki bowls.
If you’ve checked out earlier posts on the FFI Knife Skills and Raw Food modules, you’ll know that this vegan cooking course is no joke. I’ve at times felt completely in over my head and can feel a bit of imposter syndrome creep in with these more complex lessons. But, whenever I complete a lesson or a module, I feel so energized and ready to learn more. Particularly after FFI Module 3: Fermentation, I’m seeing how these skills are ones I’ll take with me for the rest of my life. So, thank you again for following along on this journey – through imperfect, it’s so worthwhile.
")


!")
Thankyou for helping out, excellent info .
You’re so welcome!
Hello Angelica
I was on the course too and I couldn’t finishes now the site is complete gone, they don’t even respond to my emails they are gone too. How can a company that made 2.000.000 dollars during the pandemic leave all their student hanging. Also they say it is a life time access to the course after I paid the money that I save to take the course realizing that is not really for the home cook. very sad indeed.
thanks for your info.
Lorena
Hi Lorena, I’m so sorry you had a less than positive experience with FFI. I’d keep trying them – sounds like you deserve a refund!